apa yang sedang Anda cari?
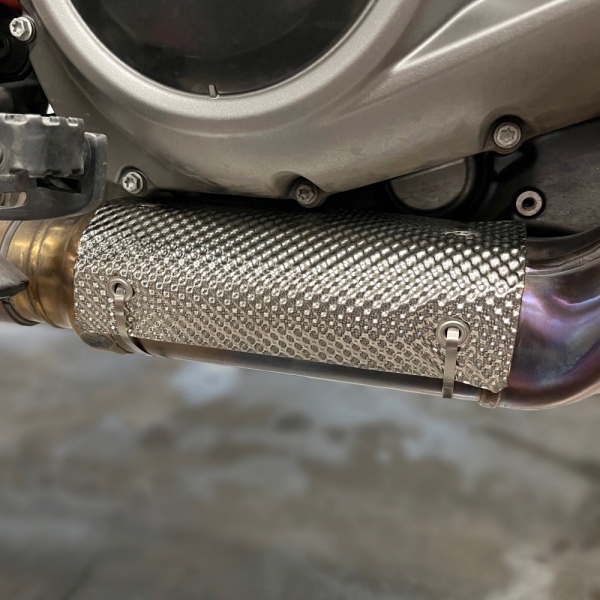
Pipa knalpot panas tidak selalu membutuhkan isolasi di sepanjang keseluruhannya. Terkadang masalahnya terletak pada bagian pendek di bawah terowongan transmisi, di samping sambungan selang, atau dekat panel bodi. Dalam situasi tersebut, isolasi yang diposisikan dengan benar sangat penting.pelindung panas pipa knalpotdapat mengatasi area yang terbuka tanpa mengubah seluruh pipa menjadi rakitan berinsulasi.
Yang penting bukanlah sekadar sepotong logam. Yang penting adalah pelindung dengan cakupan yang tepat, konstruksi termal yang sesuai, dan perangkat pemasangan yang cocok dengan knalpot yang terpasang. Sebuah kit mungkin sesuai dengan diameter pipa, tetapi tetap tidak cocok untuk ruang di sekitarnya.
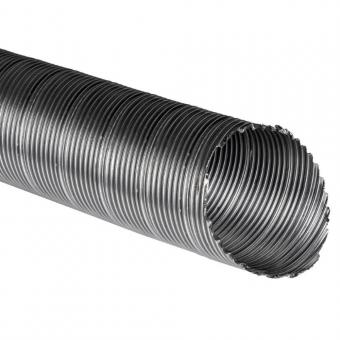
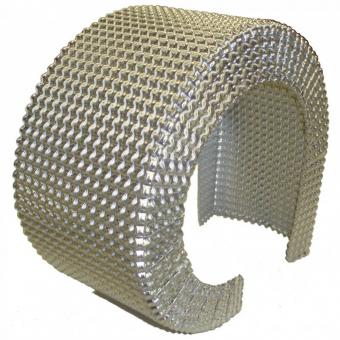
BSTFLEX menawarkankit pelindung panas pipa knalpot baja tahan karatdan sebuahkit pelindung panas knalpot aluminiumKeduanya menyediakan titik awal untuk proyek pelindung pipa otomotif; pemilihan akhir harus mengikuti gambar instalasi dan kondisi pengoperasian.
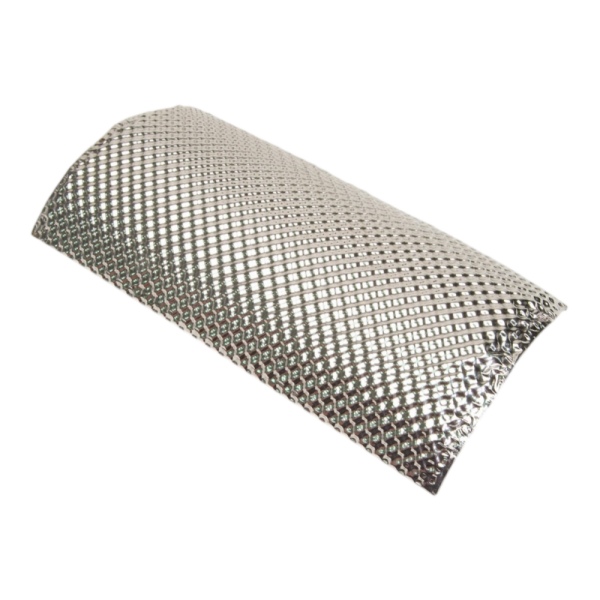
Ada tiga dimensi yang perlu dipertimbangkan sebelum membandingkan material: diameter luar pipa knalpot, dimensi pelindung itu sendiri, dan ruang yang ditempati oleh keseluruhan rakitan yang terpasang.
Daftar produk BSTFLEX saat ini memberikan dimensi referensi berikut. Ini adalah deskripsi katalog, bukan gambar instalasi akhir.
| Referensi yang diterbitkan | Bajakit baja ess, hal. 77 | Kit aluminium, hal. 76 |
|---|---|---|
| Panjang perisai | 600 mm | 600 mm |
| Diameter perisai nominal yang tercantum dalam daftar. | 120 mm | 120 mm |
| Rentang diameter pipa knalpot yang tercantum dalam daftar | 52–90 mm | 52–90 mm |
Dimensi pelindung 120 mm bukanlah klaim kecocokan pipa 120 mm.Rentang pemasangan tercantum secara terpisah. Konfirmasikan profil pelindung yang disediakan, susunan isolasi, dan pengaturan braket sebelum menggunakan nilai mana pun dalam perhitungan jarak bebas.
Sebagai contoh, pipa dengan diameter luar terukur 2,5 inci adalah 63,5 mm, dan diameter luar 3 inci adalah 76,2 mm. Keduanya berada dalam rentang 52–90 mm yang dipublikasikan, tetapi flensa, selongsong sambungan, atau tikungan di dekatnya masih dapat menghalangi pemasangan. Diameter luar 4 inci adalah 101,6 mm dan berada di luar rentang yang dinyatakan tersebut.
Ukur lokasi pemasangan yang sebenarnya. Jangan memesan hanya berdasarkan ukuran pipa nominal, dan jangan sampai salah mengartikan diameter dalam pipa dengan diameter luar.
Bayangkan sebuah pipa knalpot di bawah lantai kendaraan dengan konektor kabel di sampingnya. Sebuah pelindung yang ditempatkan hanya di atas pipa dapat mengurangi paparan radiasi langsung ke lantai, sementara konektor di samping pipa tetap terpapar. Memutar pelindung yang sama akan mengubah area mana yang dilindunginya.
Tandai komponen yang perlu dilindungi pada foto instalasi. Kemudian periksa cakupan sudut pelindung di sekitar pipa dan panjangnya di sepanjang pipa. Periksa paparan di sekitar kedua ujung, di sekitar tikungan, dan melalui setiap lubang yang diperlukan.
Pelindung pipa parsial berbeda dengan selimut yang dirancang untuk mengelilingi suatu komponen. Memperluas pelindung parsial hingga sepenuhnya menutupi knalpot merupakan perubahan desain, bukan peningkatan otomatis. Cakupan harus mengikuti tujuan termal dan batasan dari produsen knalpot.
Untuk sebuahpelindung panas knalpot otomotifTarget suhu yang dimaksud dapat berupa suhu panel lantai, selang, konektor, atau penutup di dekatnya. Nyatakan target suhu tersebut, bukan hanya meminta pelindung yang terlihat lebih dingin atau lebih tebal.
Beberapa pelindung pipa knalpot menggunakan braket atau penyangga untuk menjaga jarak dari pipa panas. Lainnya menggabungkan insulasi dalam konstruksi yang dirancang untuk kontak yang lebih dekat. Metode pemasangan harus sesuai dengan produk yang dipilih.
Dalam desain yang terpisah, celah tersebut membatasi kontak langsung antara pipa dan pelindung serta memengaruhi aliran udara di sekitar rakitan. Pelindung tetap menerima radiasi termal, dan penyangganya dapat menghantarkan panas. Oleh karena itu, celah udara merupakan bagian dari sistem termal, bukan jaminan bahwa permukaan luar tetap dingin.
Jangan meratakan braket atau mengisi celah dengan isolasi cadangan kecuali modifikasi tersebut merupakan bagian dari desain yang disetujui. Demikian pula, jangan berasumsi bahwa memindahkan pelindung lebih jauh dari pipa akan meningkatkan setiap instalasi: hal itu dapat mengurangi jarak bebas ke komponen yang dilindungi.
Konfirmasikan jarak minimum yang terpasang pada braket, tepi pelindung, dan tikungan pipa. Periksa kembali setelah memperhitungkan pergerakan gas buang dan ekspansi termal. Diameter cangkang nominal saja tidak dapat menentukan jarak bebas lokal tersebut.
Perbedaan yang lebih luas antara pelindung penahan jarak dan insulasi yang pas dibahas dalam artikel kami.panduan pelindung panas knalpot.
Apelindung panas knalpot yang dipasang dengan klemMembutuhkan posisi pemasangan yang sesuai serta klem dengan diameter yang tepat. Tunjukkan lokasi klem yang diusulkan pada gambar pipa, termasuk ruang yang dibutuhkan untuk menjangkau pengencang.
Periksa adanya bekas las, flensa, dudukan sensor, dan perubahan diameter pipa. Hal-hal ini dapat mengganggu klem atau menggeser pelindung dari posisi yang seharusnya. Perangkat keras harus menahan pelindung tanpa membebani bagian rakitan knalpot yang tidak sesuai.
Jangan memasang kit pelindung pipa standar melintasi konektor fleksibel atau bellow dengan cara yang membatasi pergerakannya. Jaga agar kabel sensor, saluran pembuangan, dan sambungan servis tetap mudah diakses. Gunakan perangkat keras dan petunjuk pengencangan yang ditentukan untuk kit yang disediakan, bukan nilai torsi umum.
Pelindung ini bukan merupakan penyangga knalpot. Pelindung ini juga tidak dapat memperbaiki pipa yang retak, gantungan yang rusak, atau kebocoran knalpot. Atasi kerusakan tersebut terlebih dahulu sebelum mempertimbangkan perlindungan panas tambahan.
Kit BSTFLEX berbahan baja tahan karat menggunakan pelindung baja tahan karat 304 dengan lapisan isolasi. Kit aluminium menggunakan konstruksi multi-lapisan semi-kaku yang telah dibentuk sebelumnya; daftarnya mencakup braket pemasangan baja tahan karat, baut, dan klem selang.
Deskripsi tersebut mengidentifikasi berbagai konstruksi awal. Deskripsi tersebut tidak menentukan mana yang akan menghasilkan suhu terendah pada kendaraan tertentu. Tanyakan tentang jenis dan ketebalan logam, jenis isolasi, profil akhir, susunan pemasangan, dan kondisi penggunaan yang diizinkan.
Untuk proyek yang sensitif terhadap berat, bandingkan massa keseluruhan rakitan yang diusulkan. Untuk instalasi yang terpapar kontaminasi jalan atau kontak mekanis, tinjau permukaan luar, tepi, dan detail penahannya. Nama material saja tidak menentukan fitur-fitur tersebut.
Persyaratan suhu juga membutuhkan lokasi. Suhu gas buang, suhu permukaan pipa, suhu sisi panas isolasi, dan suhu permukaan luar pelindung adalah pengukuran yang berbeda. Konfirmasikan mana yang dijelaskan oleh setiap batasan yang dikutip.
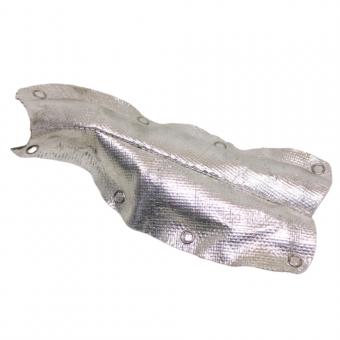
Kit pipa panjang tidak selalu memiliki bentuk yang paling berguna. Saat perlindungan dibutuhkan di sekitar tikungan lokal atau area terbuka yang sempit, tinjau kembali...Bantalan Pelindung Panas Baja Tahan KaratKonstruksinya mencakup insulasi suhu tinggi di antara permukaan baja tahan karat, dengan sambungan las dan lubang pemasangan. Produk ini dapat dibentuk mengikuti lekukan, tetapi pemasangan dan jarak bebasnya masih memerlukan tinjauan aplikasi.
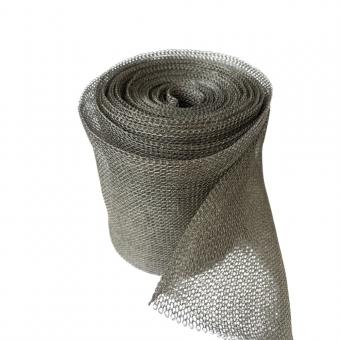
Situasi berbeda muncul ketika knalpot sudah memiliki pelindung luar yang sesuai dan yang dibutuhkan adalah sisipan isolasi di belakangnya.Pelapis Pelindung Panas KnalpotDirancang untuk ruang antara pipa dan pelindung luar. Ini bukan nama pengganti untuk kit penjepit eksternal.
Jika tujuannya adalah isolasi yang pas di area pipa yang lebih besar, gunakanpanduan pemilihan isolasi pipa knalpotuntuk mengevaluasi jaket, selongsong, dan konstruksi lainnya. Pastikan perbedaan tersebut tercantum dengan jelas pada pesanan pembelian: pelindung yang dipasang pada pipa, bantalan lokal, lapisan tersembunyi, atau jaket isolasi.
Tes yang bermanfaat menjawab pertanyaan termal awal. Jika masalahnya adalah konektor yang terlalu panas, ukur konektor tersebut atau titik penilaian yang ditentukan. Pembacaan yang lebih rendah di tengah pelindung tidak membuktikan bahwa konektor di samping tepinya terlindungi dengan baik.
Sepakati kondisi pengujian sebelum membandingkan hasilnya: beban mesin, suhu sekitar, aliran udara, durasi pengoperasian, dan lokasi pengukuran. Sertakan pengoperasian dengan aliran udara rendah atau periode setelah penghentian operasi jika kondisi tersebut relevan dengan aplikasi.
Gunakan personel yang berkualifikasi dan metode pengukuran yang sesuai dengan permukaan yang diuji. Periksa ujung pelindung, lubang, dan area pemasangan serta bagian tengahnya. Catat konfigurasinya agar setiap perbandingan menggunakan cakupan dan kondisi pemasangan yang sama.
Setelah knalpot mendingin dengan aman, periksa apakah ada pergerakan, gesekan, pengencangan yang longgar, dan perubahan jarak. Pelindung harus tetap berada pada posisi yang seharusnya agar kinerja termalnya tetap optimal.
Jangan menafsirkan pengurangan panas sebagai jaminan aman disentuh. Pertahankan pelindung dan jarak aman asli yang diperlukan, dan dapatkan persetujuan aplikasi sebelum menambahkan isolasi di sekitar konverter katalitik, filter partikulat, atau komponen knalpot sensitif suhu lainnya.
Untuk permintaan perlengkapan standar, sebutkan referensi produk, diameter luar pipa yang diukur, panjang pemasangan yang dapat digunakan, dan ruang yang tersedia di sekitar pelindung yang diusulkan. Sertakan foto dengan komponen yang dilindungi yang telah ditandai.
Untuk sebuahpelindung panas pipa knalpot khususTambahkan tampilan samping dan penampang yang berdimensi. Tunjukkan cakupan yang dibutuhkan, posisi braket, tekukan, bagian yang berdekatan, dan ukuran akhir maksimum yang diizinkan. Tentukan kondisi pengoperasian dan persyaratan suhu komponen yang harus didukung oleh pelindung tersebut.
Nyatakan apakah penawaran harga hanya mencakup pelindung saja atau rakitan lengkap dengan isolasi, braket, klem, dan pengencang. Untuk pasokan produksi, sertakan jumlah prototipe, volume batch yang diharapkan, dan revisi gambar. Catat dimensi dan detail material mana yang tetap dan mana yang dapat diusulkan oleh BSTFLEX.
Pengembangan kustom dapat dibahas di dalam BSTFLEX.Rangkaian produk pelindung dan isolasi panas knalpotTujuannya adalah menghasilkan bagian yang menutupi area yang dibutuhkan dan sesuai dengan instalasi, bukan sekadar versi yang lebih besar dari pelindung katalog.
Kirimkan dimensi pipa knalpot dan foto pemasangan Anda ke BSTFLEX.untuk pemilihan kit atau penawaran khusus. Identifikasi kit baja tahan karat atau aluminium sebagai referensi awal jika sesuai, dan sertakan perangkat keras dan jumlahnya yang dibutuhkan.

No.10, Chuangxin North Road, Nanshan Park, Ningguo Economic and Technological Development Zone, Ningguo City, Anhui Province, China
telp/Whatsapp : 0086-15856303740
surel : sales@bstbraidedsleeve.com
Skype : vanesa-cheng